

First aid and CPR are vital skills, empowering individuals to respond effectively during emergencies, potentially saving lives and minimizing lasting harm.
Understanding these techniques, guided by international standards and readily available training like Heartsaver, is crucial for all citizens.
Effective emergency response relies on assessing situations, activating EMS (like dialing 911), and providing immediate care until professional help arrives.
Why First Aid & CPR Training is Crucial
First aid and CPR training are undeniably crucial because emergencies happen unexpectedly, and immediate response can dramatically alter outcomes. Without intervention, treatable conditions can quickly escalate into life-threatening situations.
Knowing basic life support, including chest compressions and rescue breaths, empowers bystanders to maintain circulation and oxygenation until advanced medical personnel arrive. This is particularly vital in cases of cardiac arrest, where every second counts.
Furthermore, training equips individuals to recognize and appropriately address common injuries like bleeding, burns, fractures, and allergic reactions.
The “Get Trained. Save Lives.” campaign highlights the importance of widespread awareness and skill development. Practical training, including role-playing scenarios for emergency operators and witnesses, builds confidence and competence.
Ultimately, first aid and CPR training isn’t just about acquiring skills; it’s about fostering a culture of preparedness and community resilience, potentially transforming anyone into a life-saver.
Legal Considerations & Good Samaritan Laws
Understanding the legal landscape surrounding first aid and CPR is essential for anyone willing to assist in an emergency. Good Samaritan laws are designed to protect individuals who voluntarily provide assistance to others in need, shielding them from potential liability.
These laws generally offer protection as long as care is provided in good faith, without gross negligence, and within the scope of one’s training. However, specific regulations vary by location, so awareness of local laws is crucial.
While offering aid, it’s important to act reasonably and avoid exceeding your level of expertise.
Documentation of the care provided, including observations and interventions, can be beneficial.
Ultimately, Good Samaritan laws encourage intervention by reducing the fear of legal repercussions, fostering a more compassionate and responsive community. Knowing your rights and responsibilities empowers you to act confidently when someone’s life is at stake.
Assessing the Situation
Prioritize scene safety and quickly evaluate the environment for hazards before approaching the victim, ensuring your own well-being first.
Scene Safety & Initial Assessment
Before providing any aid, ensuring scene safety is paramount. This involves identifying and removing or mitigating any potential hazards – traffic, electrical wires, unstable structures, or even aggressive bystanders. Your safety, and that of any bystanders, must come first. Once the scene is deemed safe, perform an initial assessment.
Begin by forming a general impression of the situation: what happened? How many victims are there? What are the obvious injuries? Then, systematically check for responsiveness. Gently tap the person and shout, “Are you okay?” Observe for any movement, sounds, or reactions. If unresponsive, immediately activate EMS (calling 911) and begin the assessment process, looking for life-threatening conditions like severe bleeding or difficulty breathing. Remember, a thorough initial assessment guides subsequent care.

Checking for Responsiveness
Determining responsiveness is the first critical step in assessing an injured or ill person. Begin by gently tapping the individual’s shoulder and shouting a clear, firm question like, “Are you okay?” or “Can you hear me?”. Simultaneously observe for any signs of movement, such as twitching or stirring, and listen for verbal responses, even groaning.
Visual inspection is also key – look for any obvious signs of life, like chest rise and fall. If there is absolutely no response to verbal or tactile stimuli, the person is considered unresponsive. This immediately necessitates activating Emergency Medical Services (EMS) by calling 911. Following this, proceed with assessing for breathing and pulse, preparing for potential CPR intervention if needed. Accurate assessment dictates the next course of action.
Activating Emergency Medical Services (EMS) ౼ Calling 911
Promptly activating EMS is paramount when encountering an unresponsive individual or a serious medical emergency; Dial 911 (or your local emergency number) immediately. Remain calm and speak clearly to the dispatcher, providing your exact location – street address, landmarks, or cross streets.
Clearly articulate the nature of the emergency: what happened, the number of victims, and the condition of the person(s) involved. Answer all questions the dispatcher asks; they are trained to gather vital information. Do not hang up until the dispatcher instructs you to do so, as they may provide crucial pre-arrival instructions. Emergency operators often utilize role-play simulations to prepare for such scenarios, ensuring efficient assistance.
CPR Fundamentals
Cardiopulmonary Resuscitation (CPR) involves chest compressions and rescue breaths, aiming to circulate blood and oxygen when breathing or heartbeat stops.
Effective CPR requires a rate of 100 compressions per minute with full chest recoil, crucial for successful resuscitation efforts.
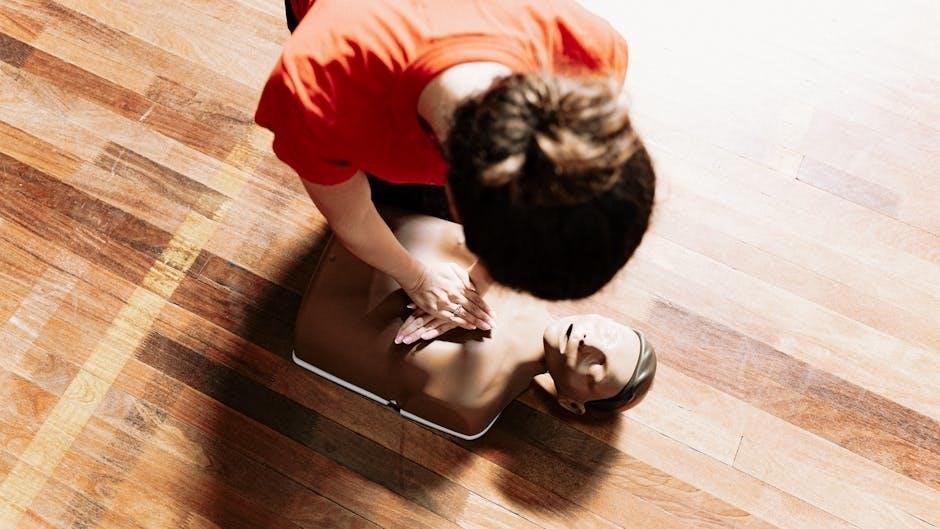
Adult CPR: Chest Compressions & Rescue Breaths
Initiating CPR on an adult begins with confirming unresponsiveness and immediately activating Emergency Medical Services (EMS) by calling 911. Following this, position the individual on a firm, flat surface.
Chest compressions are performed by placing the heel of one hand in the center of the chest, with the other hand interlocked on top. Compress the chest at least two inches deep, and at a rate of 100-120 compressions per minute – striving for full chest recoil after each compression is vital.
After every 30 compressions, deliver two rescue breaths. To administer breaths, tilt the head back and lift the chin to open the airway. Pinch the nose shut, create a tight seal over the mouth, and breathe for one second, observing for chest rise. Continue cycles of 30 compressions and 2 breaths until professional help arrives or the person shows signs of life.
Remember, consistent, high-quality compressions are the cornerstone of effective CPR.
CPR Rate and Depth
Maintaining the correct rate and depth during chest compressions is paramount for successful CPR. The recommended compression rate is between 100 and 120 compressions per minute – a fast, steady rhythm is crucial for circulating blood.
For adult CPR, compressions should be at least two inches (approximately 5 cm) deep, ensuring effective compression of the heart. However, equally important is allowing for complete chest recoil after each compression; this allows the heart to refill with blood.
Insufficient depth or rate reduces the effectiveness of CPR, while excessive force can cause injury. Consistent, high-quality compressions, coupled with proper hand placement, maximize the chances of a positive outcome. Remember, minimizing interruptions to compressions is also vital.
Training and practice are key to mastering the correct technique.
CPR for Children & Infants: Modifications
CPR techniques require adjustments when performed on children and infants due to their smaller size and physiological differences. For children, compressions should be approximately two inches deep, using one or two hands depending on the child’s size.
Infant CPR utilizes two fingers (or two thumbs encircling the chest) for compressions, aiming for about 1.5 inches of depth. The compression rate remains consistent at 100-120 per minute, but gentler force is essential.
Rescue breaths are also modified; deliver gentle puffs of air, just enough to make the chest rise visibly. Proper head tilt-chin lift is crucial, but avoid overextending the neck, especially in infants. Training specifically focused on pediatric CPR is highly recommended.
Common First Aid Scenarios
Recognizing and responding to common emergencies – choking, bleeding, burns, fractures, asthma, and spinal injuries – demands specific skills and swift, informed action.
Choking: Adult, Child & Infant Procedures
Choking requires immediate intervention, differing based on the victim’s age. For adults and children, assess responsiveness and call for help. If conscious but choking, encourage forceful coughing. If coughing is ineffective, administer abdominal thrusts (Heimlich maneuver) until the object is dislodged or the person becomes unresponsive.
For infants, support the head and deliver five back blows followed by five chest thrusts. Alternate between these until the object is expelled or the infant becomes unresponsive. If the infant loses consciousness, begin CPR.
It’s crucial to understand that proper technique is vital to avoid injury. Training courses provide hands-on practice, building confidence and competence in managing choking emergencies effectively. Remember, quick action can be life-saving.
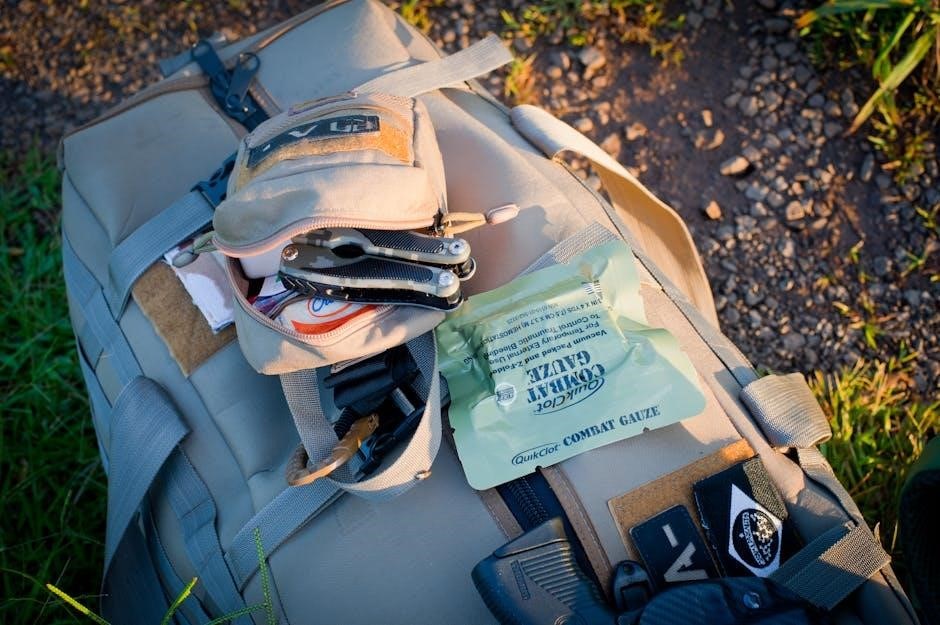
Bleeding Control: Direct Pressure & Wound Care
Controlling bleeding is a primary first aid skill, crucial for preventing shock and further injury. The initial step is always direct pressure – apply firm, consistent pressure directly onto the wound using a clean cloth. Elevate the injured limb above the heart, if possible, to help reduce blood flow.
If bleeding doesn’t subside, apply additional layers of cloth without removing the original; For severe bleeding, consider using a tourniquet as a last resort, only if trained to do so. Once bleeding is controlled, clean the wound gently with soap and water.
Cover the wound with a sterile bandage. Monitor for signs of infection, such as increased pain, swelling, redness, or pus. Seek medical attention for deep or heavily bleeding wounds.
Burns: Classification & Treatment
Burns are categorized by severity: first-degree (redness, pain), second-degree (blisters), and third-degree (charred skin, potential nerve damage). Immediate first aid depends on the burn’s extent.
For first and minor second-degree burns, cool the area under cool (not cold) running water for 10-20 minutes. Cover loosely with a sterile, non-adhesive bandage. Do not apply ointments, butter, or ice.
Severe burns require immediate medical attention. Do not remove clothing stuck to the burn. Cover the burn loosely with a clean, dry cloth. Monitor for signs of shock and keep the person warm. Seek emergency medical help promptly for large burns, burns on the face, hands, feet, or genitals, or any third-degree burn.
Fractures, Sprains & Strains: Immobilization Techniques
Recognizing musculoskeletal injuries – fractures (broken bones), sprains (ligament damage), and strains (muscle/tendon damage) – is crucial. Initial treatment focuses on immobilization to prevent further harm.
For suspected fractures, do not attempt to straighten the limb. Immobilize it in its current position using a splint – cardboard, rolled magazines, or pillows can work. Pad the splint well and secure it with bandages.
Sprains and strains benefit from the RICE protocol: Rest, Ice, Compression, and Elevation. Apply ice packs for 20 minutes at a time, several times a day. Use a compression bandage to reduce swelling, and elevate the injured limb above the heart. Seek medical evaluation to confirm the injury and rule out a fracture.
Head, Neck & Spinal Injuries: Recognition & Stabilization
Suspect a head, neck, or spinal injury if a person experiences a mechanism of injury – a fall, car accident, or direct blow to the head. Recognizing signals like pain, numbness, weakness, or altered mental status is vital.
Crucially, minimize movement of the head and neck. Instruct the person to remain still and avoid moving. Manual stabilization is key: gently hold the head and neck in a neutral, in-line position.
Do not attempt to realign the spine. Call 911 immediately. Monitor the person’s breathing and responsiveness while awaiting emergency medical services. Proper stabilization prevents potentially devastating neurological damage, emphasizing the importance of careful handling and prompt professional care.
Asthma & Allergic Reactions: Recognizing Signals & Providing Assistance
Asthma and allergic reactions can quickly become life-threatening emergencies requiring immediate attention. Recognize asthma signals like wheezing, coughing, shortness of breath, and chest tightness. Allergic reactions may present with hives, swelling, difficulty breathing, and changes in mental status.
Assist the individual in using their prescribed inhaler or epinephrine auto-injector (EpiPen), if available. Ensure proper administration technique. Call 911 if symptoms are severe or do not improve after medication use.
Keep the airway open and monitor breathing closely. Reassure the person and maintain a calm environment. Knowing how to identify signals and provide basic assistance can significantly improve outcomes until professional medical help arrives.

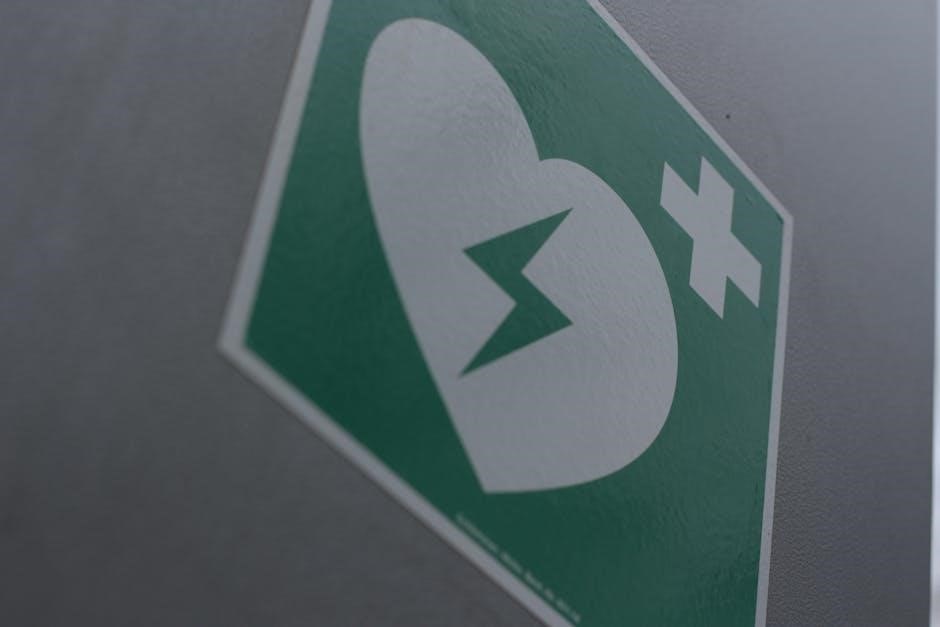
Automated External Defibrillator (AED)
AEDs are crucial for restoring a normal heart rhythm during sudden cardiac arrest, delivering a controlled electrical shock when needed for survival.
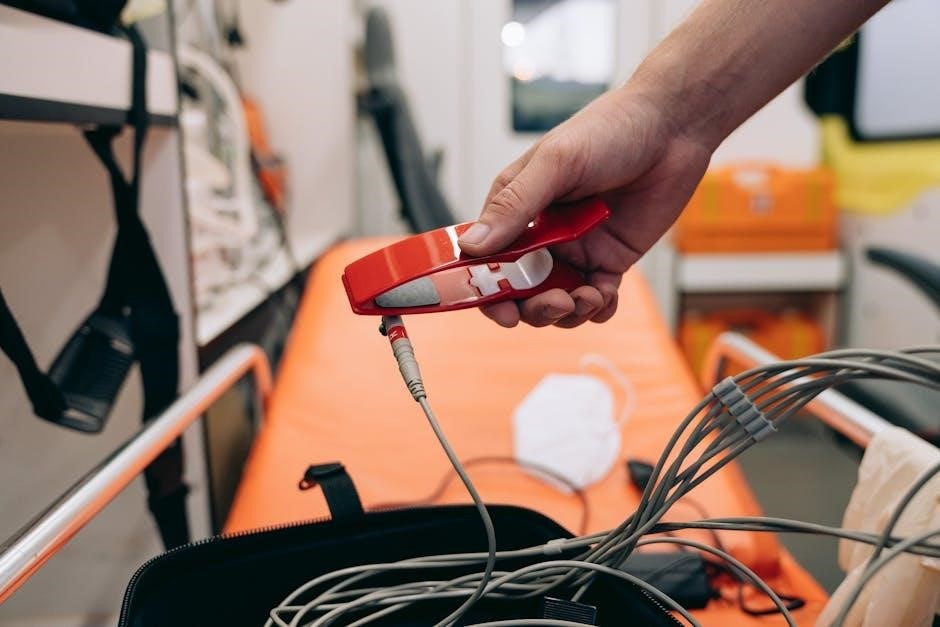
AED Operation: Step-by-Step Guide
Operating an Automated External Defibrillator (AED) is straightforward, designed for use by lay responders. First, ensure scene safety and power on the AED; it provides voice prompts guiding you through each step.
Next, attach the AED pads to the victim’s bare chest – one on the upper right, and the other on the lower left side. The AED analyzes the heart rhythm, determining if a shock is needed.
If a shock is advised, the AED will charge. Before delivering the shock, verbally announce “Clear!” ensuring no one is touching the victim. Press the shock button as instructed.
After delivering the shock (or if no shock is advised), immediately resume CPR, starting with chest compressions, following the AED’s prompts. Continue this cycle – AED analysis, shock if needed, and CPR – until professional help arrives or the victim shows signs of life.
Remember, AEDs are designed to be safe and easy to use, providing critical assistance during a life-threatening emergency.
AED Safety Precautions
Prioritizing safety when using an Automated External Defibrillator (AED) is paramount. Ensure the scene is safe – dry ground, no flammable materials nearby. Never use an AED on a victim lying in water; move them first if possible.
Before applying the pads, quickly dry the chest to ensure proper adhesion. Remove any medication patches from the chest area. Always verbally announce “Clear!” before delivering a shock, visually confirming no one is touching the victim or surrounding equipment.
Avoid direct contact with the victim during shock delivery. Do not use an AED on a victim with an implanted pacemaker or defibrillator directly over the device; position pads accordingly.
Continue to follow the AED’s voice prompts and resume CPR immediately after each analysis or shock. Proper training is essential to confidently and safely operate an AED in an emergency situation.
Post-Incident Care & Documentation
Providing emotional support to the victim is crucial, alongside detailed reporting of all first aid administered, ensuring accurate records for follow-up care.
Emotional Support for the Victim
Following a medical emergency, even after physical first aid is complete, the victim’s emotional state requires significant attention. Individuals may experience shock, fear, anxiety, or confusion, regardless of the severity of their injury or illness. A calm and reassuring presence is paramount; speak clearly and slowly, explaining what happened and what is being done.
Active listening is essential – allow the victim to express their feelings without interruption, validating their emotions. Avoid minimizing their experience or offering unsolicited advice. Simple statements like “You are safe now” or “Help is on the way” can be incredibly comforting.
Maintain eye contact and offer a gentle touch, if appropriate and welcomed, to convey empathy and support. Protect their dignity and privacy during assessment and treatment. Remember that emotional trauma can have lasting effects, and encouraging professional counseling after the incident may be beneficial.
Reporting & Documentation of First Aid Provided
Accurate reporting and documentation are crucial components of responsible first aid response, offering a clear record of events for medical professionals and potential legal considerations. Immediately after handing over care to EMS, provide a concise verbal report detailing the incident, the victim’s condition upon arrival, and all first aid interventions performed.
Subsequently, create a written record including the date, time, location, the victim’s name (if known), a description of the incident, observed signs and symptoms, the care provided, and the time EMS arrived.
This documentation should be factual and objective, avoiding personal opinions or assumptions. Practical training for emergency operators emphasizes role-play simulations to refine these reporting skills. Maintaining confidentiality and adhering to relevant privacy regulations are also essential aspects of responsible documentation.